


Preparation
Before we start download all the necessary pictures (sky, pier, body of the deamon, ice, grunge texture, head of the deamon, waves 1, waves 2, waves 3, waves 4, skull, hourglass) and brushes (birds, fog, lighting, abstract glow, water splash).
Step 1
Blending The Background
Open the pictures of the sky and the pier and drag them into the new document. Name the layer with the pier "PIER" and place it above the sky.
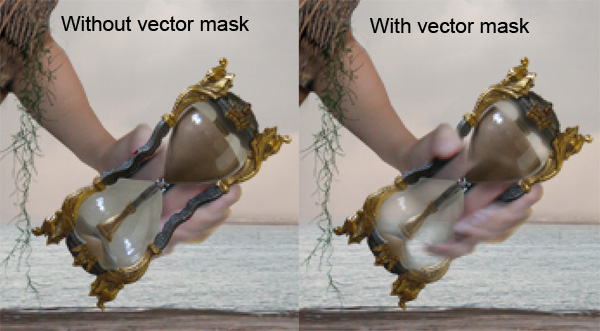
Now add the Layer Mask to the "PIER" (You can find the button Add Vector Mask in the Layers palette). Now grab the Brush Tool (B), select a soft round brush and pick black for the color. Make sure that the vector mask is selected (just click on it) and start painting over the areas you want to disappear.
You should use a smaller brush around the horizon to make the blending more precise. After this step your picture should be similar to that shown below.

Step 2
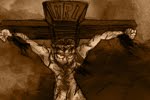
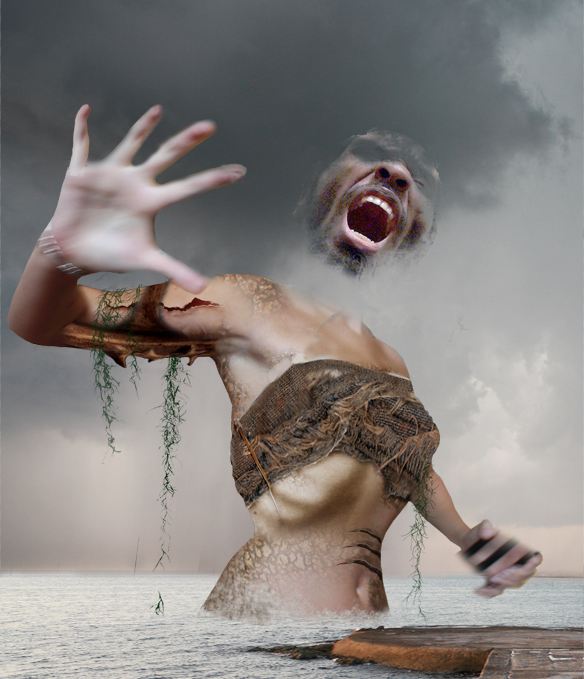
Adding The Demon
Open the picture of the body of the deamon, drag it into the manipulation and name it "BODY." Now open the picture with the head, grab the Marquee Tool (M) and select the area of the head. Now select the Move Tool (V) and drag the head into the photo manipulation. Name the layer "HEAD." Press Command + T. It allows you to rotate with the layer. Set the rotation so it will be the same as the rotation of the demon's neck. When you're satisfied, press Enter.
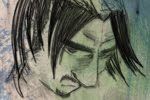
Now we have to blend the head. Add the vector mask to the "HEAD" and with a black brush paint over the areas you want to hide, which means the background of the stock image and also parts of the face which are already covered with the ice. Also, hide the eyes because we cover them with the skull shortly.
If you're not sure what to hide and what not to, then review the image below.
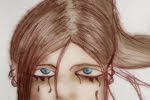
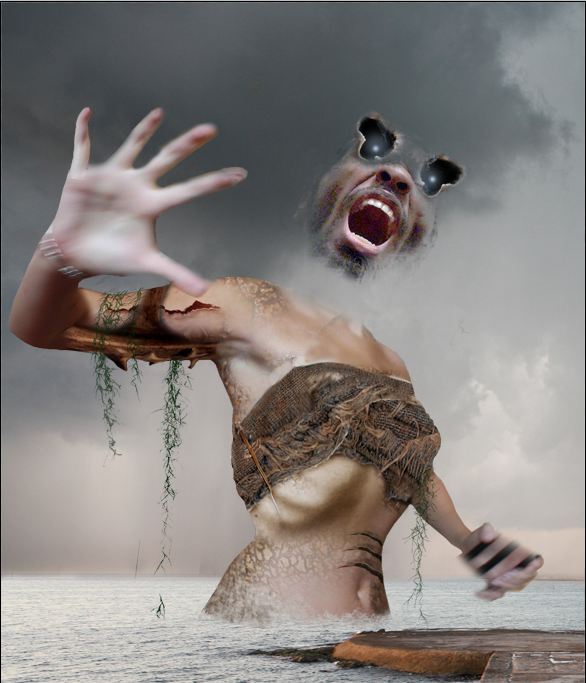
Open the picture of the skull and select the hole instead of the eyes (there are many ways to select something, you can use whatever you are comfortable with). Then drag them into the manipulation and place them instead of the eyes.
Create a new layer. Using the Brush Tool (B), pick a cyan color and paint two dots instead of pupils. After this step your photo manipulation should look like the image below.
Step 3
Adding Ice
In this step we will add ice above the demon's head and hand. Open the picture of ice. Now go to Select > Color Range... and set the value Fuzziness to about 170. Color Range is a useful tool if you need to make selections based on their color or tonal value.
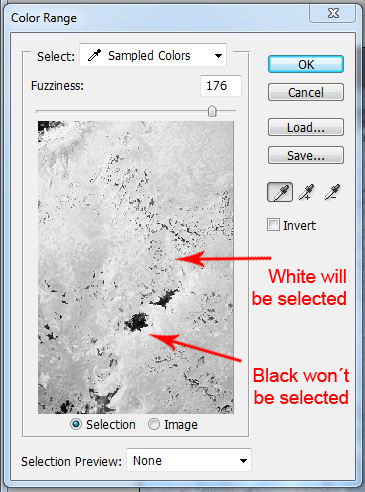
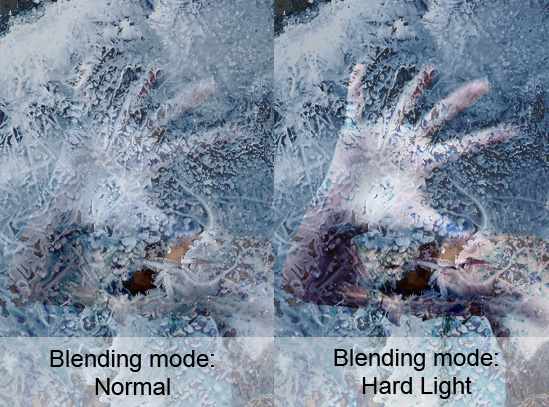
After you set the Fuzziness, press OK and the tool makes the selection. Press Command + C to copy the selection, click on your photo manipulation and press Command + V to paste the ice. Now press Command + T and resize it to the proper size (I resized it to 25%). Change the Blending Mode to Hard Light (you can find the Blending Mode on the top of the Layers palette).
Add the vector mask to the "ice" layer. Grab the Brush Tool (B) and load the abstract glow brushes. If you don't know how to add brushes you can look at this tutorial. It's better to use shaped brushes instead of classical rounded ones because this way you get a more natural result.
Now paint with black on the vector mask over the part which you want to disappear. During the process you should change the size and opacity of the brush to get more variations.
Now we will do the same process with the head. Use Color Range to select the ice. Copy it into the manipulation, then change the blending mode to Hard Light, add the vector mask, and blend it by using a glow brush. You should end with something like the image shown below.
Step 4
Shading The Head
So far the head is flat and it doesn't look very realistic. In this step we will add some highlights and shadows to fix it.
Create a new layer and fill it with a gray color (#808080) and change the blending mode of the layer to Overlay. Now using of Dodge Tool and Burn Tool add the highlights and shadows. By adding this new "gray" layer you are working using nondestructively, which means that you can always go back and make changes. If you use dodge and burn directly on the "head" layer, then you aren't able to fix anything later.
Step 5
Adding The Hourglass
Open the picture with the hourglass and make a selection of it. Then drag it into the manipulation, change the size and rotate it (Command + T) so that it has the same direction as the hand. Add a vector mask and select a small round brush, set the opacity of the brush on at a low value of around 15%, pick a black color and start to paint over the parts of the hourglass that should be semi-transparent (mainly glass).
Now we will add the movement. Copy the "hourglass" layer and place it under the original layer. Now go to Filter > Blur > Motion Blur... and set the value on 12, then press OK.
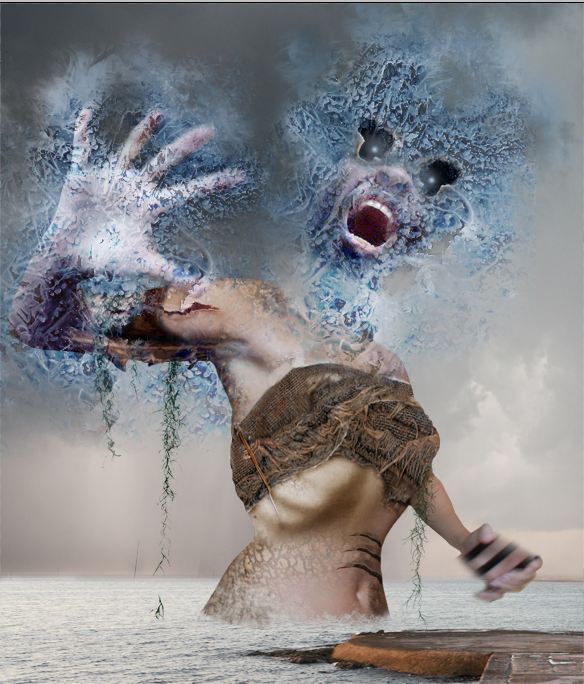
One more thing which has to be done is adding shadows. Create a new layer under the layer with movement. Fill it with #808080 color and change the blending mode on Overlay. Now select a soft, round brush, pick black for the color, lower the Opacity on 20%, and paint the shadows around the hourglass and under the hand.
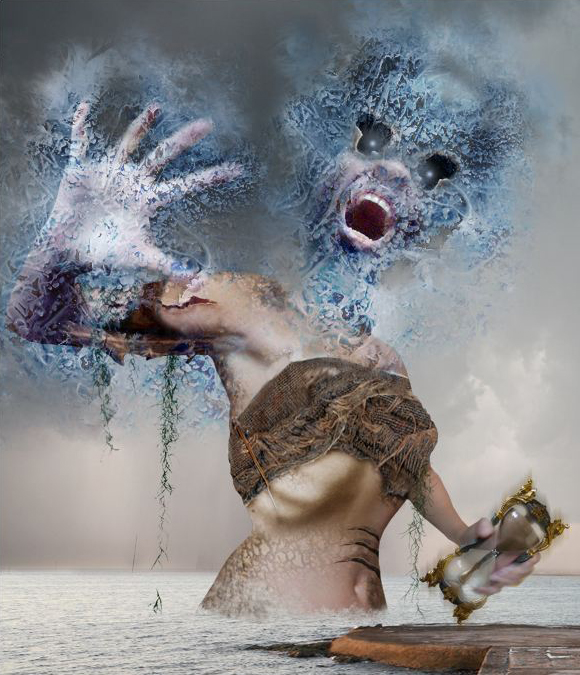
After this step your image should look like that shown below.
Step 6
Adding Water Splash
In this step we will add the water around the demon. We'll use Color Range as we did it in the previous steps.
Found some stock photos with waves. I used these - waves 1, waves 2, waves 3, waves 4 from sxc.hu and also these water splash brushes.
Open the photo with waves, go to Select > Color Range and set Fuzziness on the value you're comfortable with. It's the same as selecting ice in Step 3. Just remember that the white parts will be selected and the black will not, gray will be semi-transparent. You should place some waves in front of the demon and also some behind, so it will look realistic. For inspiration on how to place waves look at the animation below.
Step 7
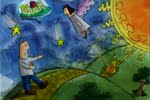
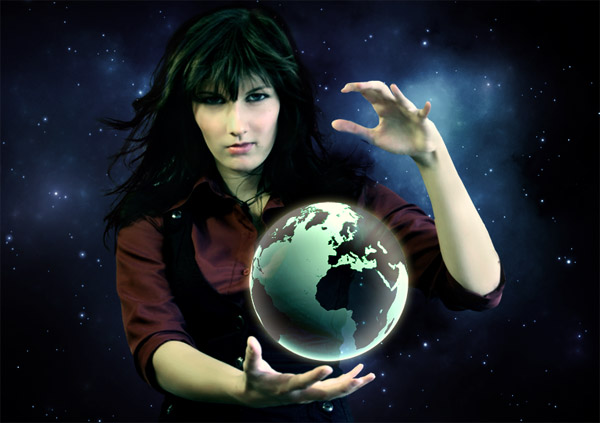
Adding The Wizard
Download a stock photo of a magician. The one I used is not publicly available, but it is no problem to find something similar. Cut out the background and using the Move Tool drag the selection into your document. Press Command + T and resize the picture to proper size.
Create a new layer above the layer with the wizard. Select the glow brush (it can be the one we used during blending the ice or you can download some you like more), pick a cyan color and paint the spell. Quite easy isn't it?
I also added lighting between his hands, but it's really up to you and how do you imagine the spell. You can use of course different colors Let your imagination play.

Step 8
Adding The Lighting
The main things are done. In the next steps we'll add some details and then change the color and lights with shadows. Let's start with the lighting.
Select the Brush Tool and add the lighting brushes you downloaded. Pick a white color, create a new layer and click on the place where you want to have lighting.
If you look at some photos of storms with lighting you'll notice that clouds around the lighting are very light. And that is exactly what we'll do now. Create a new layer again, fill it with gray and change the Blending Mode to Overlay. Now pick a soft round brush with a white color, set the Opacity on 10% and paint over the sky around the lighting to make it brighter.
I also paint some birds to fill the empty space under the demon's left and upper-right hand. But it's absolutely up to you if you do it too, or if you add some more details.
Step 9
Local Adjustments
Some parts of the demon's face should be lighter and the hourglass should have more contrast. We'll fix it in this step.
Click on the layer with the demon's face (not with the ice) and add an adjustment layer of Levels (the Create a new fill or adjustment layer button can be found in the bottom part of the Layers palette).

Set the Input Levels on 0; 1,64;255 and press OK. Now right-click on the adjustment layer and select the option Create Clipping Mask. This way the adjustment affects only the layer which is below it (in our case the face).
Now click on the layer with the hourglass and also add a Levels adjustment layer. Now set the Input Levels on 26; 1,34; 215. Press OK and create a clipping mask too.
Step 10
Adding Mist
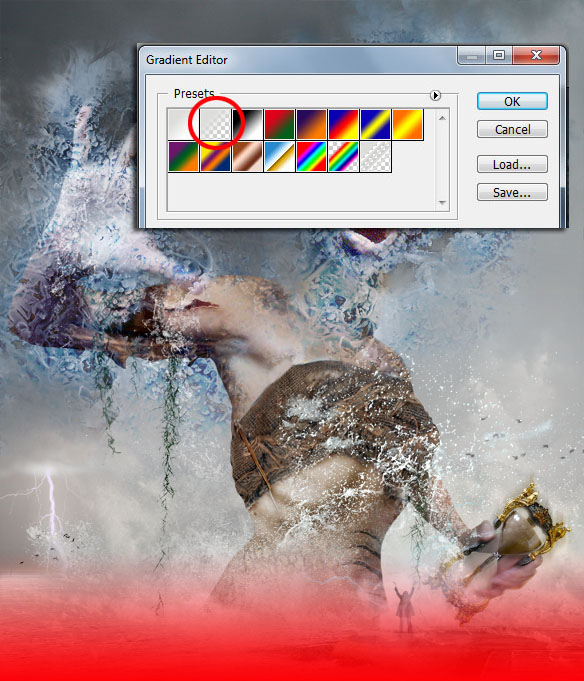
To create bit more fantasy atmosphere we'll add some mist in this step. Create a new layer on the top of your layers. Grab the Gradient Tool (G). Now press Alt and pick a bright color from the picture. Choose the type of the semi-transparent gradient you see in the picture below and paint it from the bottom up to the wizard. Better to look at the picture to understand clearly. I made the gradient red so you can see better what to do.
Step 11
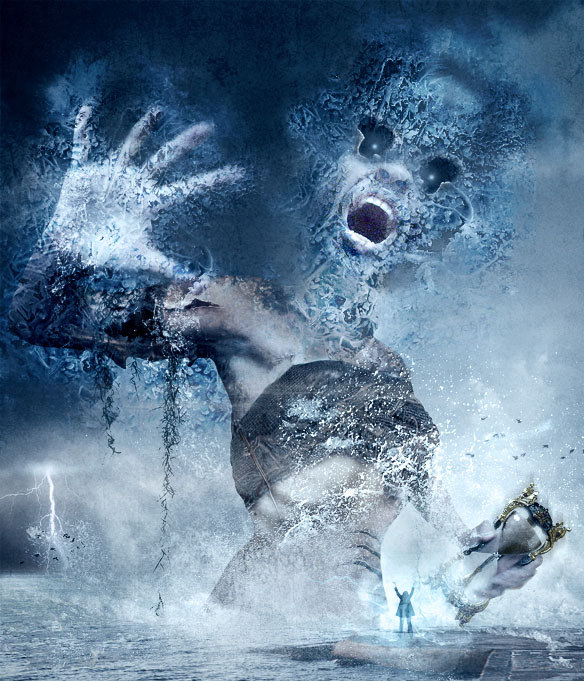
Setting The Global Lighting
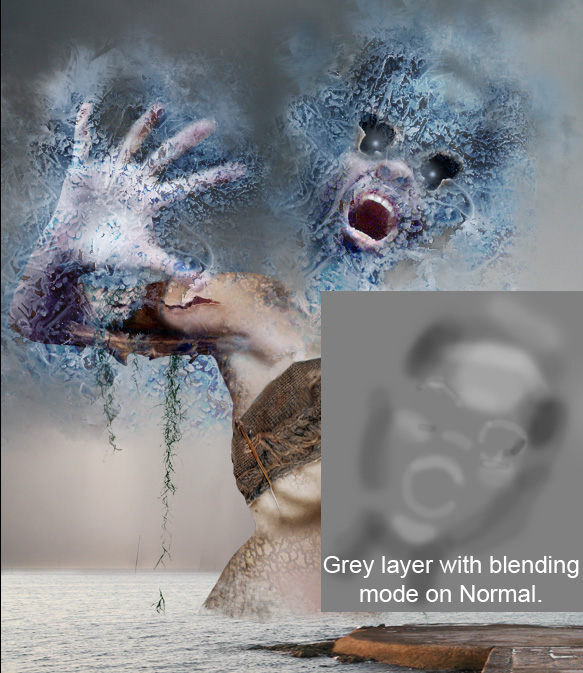
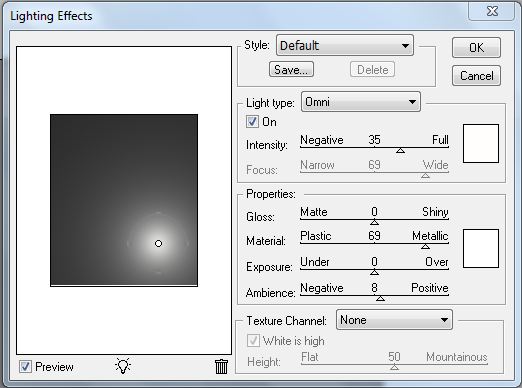
Now we'll add some more dramatic lighting. Add a new layer on the top of your layers and fill it with a solid mid gray (#808080). Change the Blending Mode on Overlay. Now go to Filter > Render > Lighting Effects... and set the menu as you can see below, then press OK.
The demon's head and right hand should be little lighter. To fix it use the Brush Tool (B), select a soft round brush, pick a white color and lower the Opacity of the brush to 10%. Now paint over the parts which should be lighter (on the same layer where you added the omni light). If you think some parts should be darker, pick a black color and paint over them.
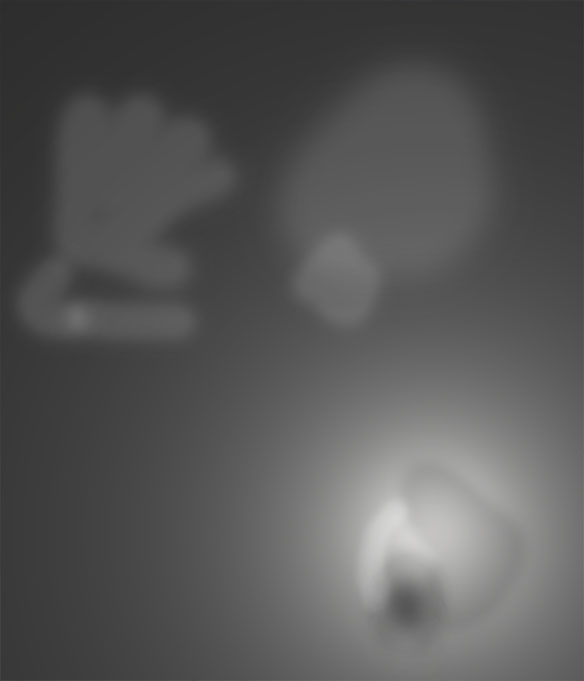
On this picture below you can see my "setting lights" layer with normal blending mode set.
As you can notice I darkened wizard little bit. The result of this step is seen in the next picture.
Step 12
Adding Texture
This is a simple step. Open the picture with the grunge texture you downloaded and drag it into the manipulation on the top of all layers. Now experiment with opacity and blending modes to get the result you will like. I used the blending mode Soft Light and set the Opacity on 37%.

Step 13
Global Adjustment
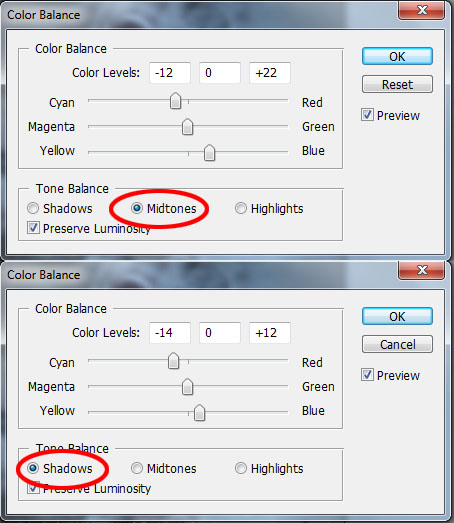
In this step we'll set the global color adjustment of the picture. At first we will desaturate it a little. Add a new adjustment layer Hue/Saturation on the top of your layers and set the Saturation on -50. Now add an adjustment layer of Color Balance and set it as shown in the picture below.
Now we'll change brightness and contrast. Add an adjustment layer of Brightness/Contrast and set both values at +10. And for the last adjustment, add a Photo Filter and set the Filter to Cyan to give a nice cyan tinge to the photo manipulation.

Step 14
Sharpening
Sharpening is the last step we'll do before this photo manipulation is finished. Grab the Rectangular Marquee Tool (M) and select the whole image. Now go to Edit > Copy Merged or just press Shift + Command + C. Then press Command + V to paste the merged image.
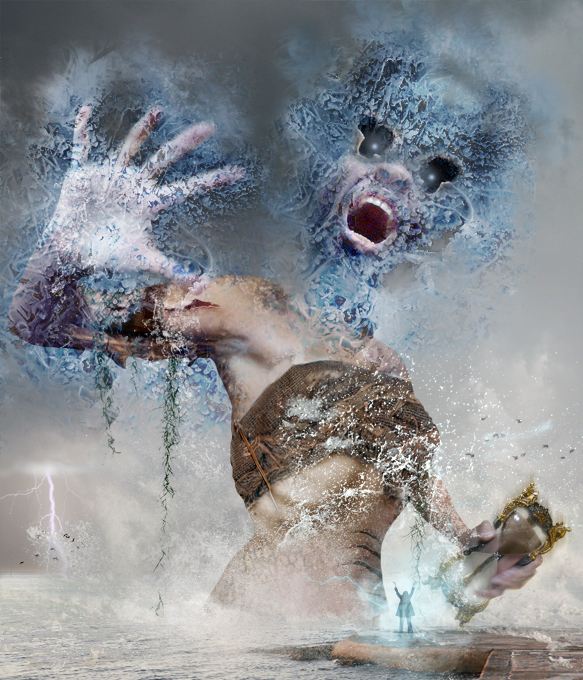
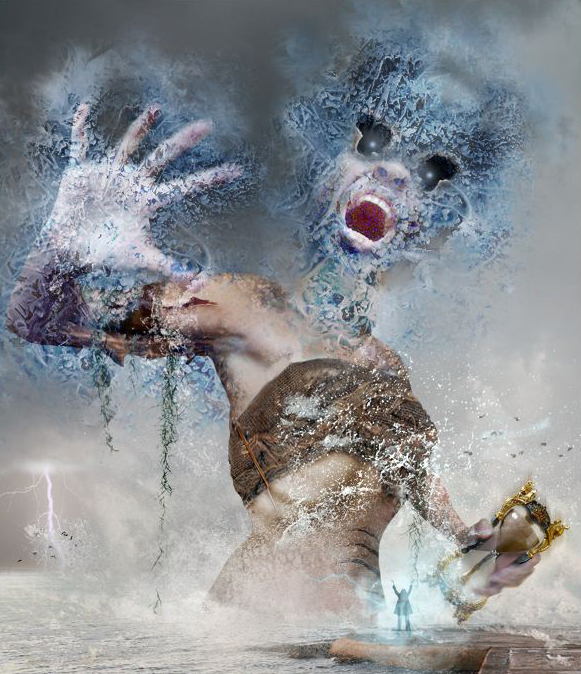
Now go to Filter > Other > Highpass and set the Radius on 4px, then press OK. The last thing you have to do is to change the Blending Mode of this layer to Overlay. The final image is shown below!
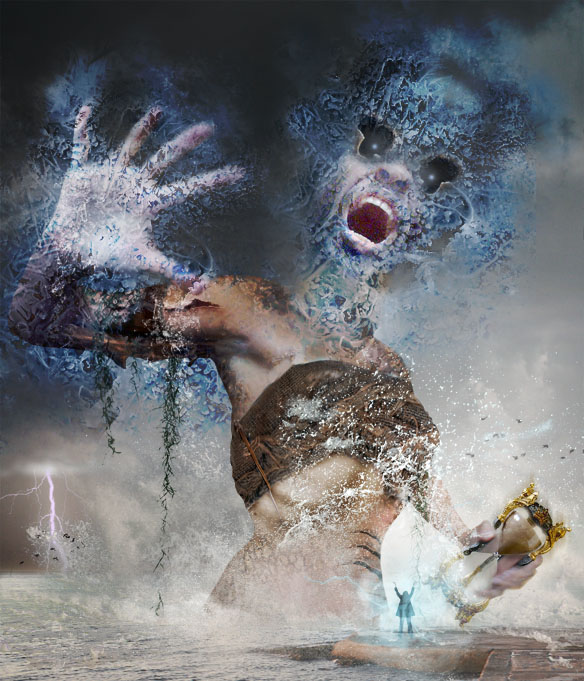
Conclusion
Congratulations! You've just learnt how to create a photo manipulation called "You Can Not Frost The Time." I hope that this tutorial was useful for you and you have learnt something new or just found some inspiration for your next project.


